Repair the defect and agree the visible result
Render repairs in Alderley Edge | Patches and cracks
A render repair has two separate questions to answer: what has failed, and what should the wall look like afterwards? A small patch can involve a significant underlying problem, while a conspicuous stain may not need removal at all. For Alderley Edge properties, this guide focuses on identifying the damaged area, understanding its relationship with the wall and agreeing a realistic finish beside the material that stays. It does not assume every crack needs the same treatment.

On this page
Describe the change over time
Explain when the defect first appeared, whether it has changed and what has already been done. A crack that reopened after an earlier repair gives different information from a recent impact mark. If photographs exist from different dates, keep them in order and show the same part of the wall where possible. The sequence can help the person assessing the defect understand what needs investigation.
Avoid assigning a cause from appearance alone. Cracks, hollow areas and staining can have several explanations. Where movement or a significant masonry defect is suspected, a suitable building professional may need to assess it before a finish repair is chosen. A stronger patch material is not a reliable substitute for finding out why the surface failed.
- Map the damage Tapping finds hollow areas; cracks and their likely cause are noted.
- Cut back Failed render is cut out to a sound edge, usually squared off.
- Fix the cause Leaking gutters, sills without drips or render below the DPC are dealt with.
- Rebuild in coats Using a material compatible with the surrounding render and masonry.
- Blend the finish Texture is matched; colour may need a coating over the wider area.
The usual order of work. The survey and the chosen products decide the actual steps.
Establish the sound boundary
The visible mark may be smaller than the affected area. Inspection should consider the attachment and condition of the surrounding render, not only the edge of the crack or missing patch. The proposed repair should explain how far removal extends and how that extent will be confirmed on site. An arbitrary rectangle drawn around a photograph may not correspond to the sound material beneath.
Where the surrounding covering is sound, retaining it may be sensible. Where it is widely detached or unsuitable, several small repairs can leave a confusing and short-lived result. The wall-rendering guide covers the alternative of renewing a complete elevation. That should be a reasoned choice based on the condition, rather than an automatic escalation from a small enquiry.
Match the repair to the existing build-up
The material at the face does not necessarily reveal every layer underneath. A patch may need to reinstate a compatible base and finish, not simply fill the recess with the nearest available product. Establish the wall and render construction as far as practicable. If the original system information exists, make it available during the survey.
Older masonry with hard later repairs requires particular care. The lime-render page explains why compatibility involves the background as well as the visible coating. A dense patch chosen only for strength can behave differently from the surrounding material. The repair specification should identify the proposed layers and the reason for their selection instead of describing everything as general making good.
Check the detail next to the damage
Repeated damage beside a downpipe, window corner or roof abutment may be related to the adjoining detail. Inspect the water route, fixing or junction as part of the assessment. A patch can look satisfactory at completion while the fault that affected it remains untouched. Allocate associated repairs clearly, including any work that belongs to another trade.
This is also important at the bottom of a wall, where ground level, splashback or an unsuitable termination can complicate the finish. Do not assume a coating can bridge those issues. A drawing or marked photograph showing the repaired detail can be useful, especially where the proposed arrangement differs from what was previously installed.
Decide whether a visible patch is acceptable
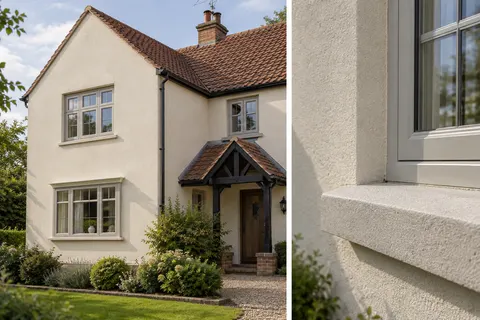
Fresh render beside an older textured surface can differ in colour, grain and relief. Weathering and previous cleaning may make an exact match difficult even when the nominal product is known. Discuss that appearance before repair begins. A local patch may be entirely acceptable in a less prominent position, while a main frontage may justify a different finishing scope.
The article on repairs beside retained texture sets out the choices. A larger bounded face can sometimes be refinished to create a clearer visual result. That additional work should be identified separately from the defect repair, so that the owner can understand what is needed technically and what is being chosen for appearance.
| Finish option | What to discuss |
|---|---|
| Local patch only | Acceptable colour and texture difference |
| Patch plus wider coating | Compatibility and extent of coating |
| Renew a complete face | Reason, stopping points and retained areas |
Use coating only after the surface is ready
A render colour change can form part of a repair project where a suitable coating is compatible with the repaired and retained material. It does not secure loose render or make an active crack stable. The repair needs to reach the required condition before the coating is applied, following the relevant product and system guidance.
Trial areas can help assess the final appearance where several materials meet. Agree the colour and finish with enough time for the sample to develop its intended appearance. A freshly damp repair may look markedly different from the wall around it. Judging it too early can lead to an unnecessary change of coating or another patch that introduces further variation.
Define the quotation's uncertainty
Some repair limits cannot be confirmed until a small area has been opened. State that uncertainty explicitly and agree how it will be handled. The proposal should identify the initial investigation, the expected repair and the approval route if the background proves worse than anticipated. Include temporary protection where an opened area cannot be completed immediately.
Access may also determine the practical scope. A small high-level defect can require substantial arrangements to reach safely, while several nearby repairs might be considered together once that access is in place. The cost guide explains why an isolated repair should not be judged solely by the visible patch area or compared with an application-only square-metre rate.
Review the repair against the agreed outcome
At completion, check the location, extent, adjoining details and reinstated fittings as well as the general appearance. Use the agreed sample or finish description and allow the relevant drying period. If the scope included a coating across a whole face, confirm that its stopping points and exclusions match the brief. Keep any remaining observations specific to a location rather than describing the entire wall as unsatisfactory.
Retain the cause assessment, repair materials and dated photographs. They are useful if the defect changes again and help a future contractor avoid repeating the same intervention without understanding it. The Alderley Edge overview links repairs with the other exterior options so that a limited defect can be considered in the context of the wider building, without assuming a full replacement is always necessary.
Common questions
Can you tell whether a crack is structural from a photograph?
A photograph can help describe its position and appearance, but it cannot reliably establish the cause. The assessment may need inspection of the wider building, its history and the wall itself. The repair proposal should reflect the findings rather than an unsupported diagnosis.
See housing and planning information for Alderley Edge and nearby places, including the source and geography behind each figure.