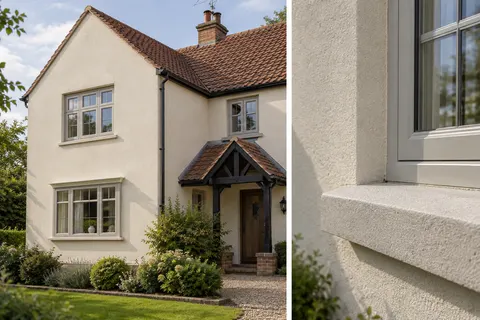
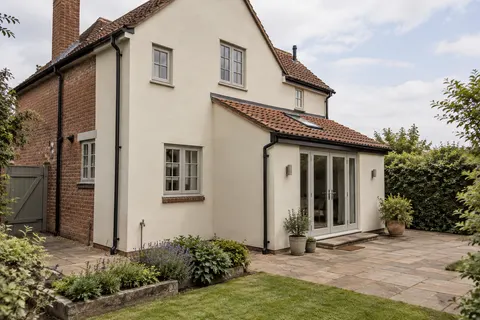
One wall, properly resolved
Wall rendering in Alderley Edge | Single elevations
A single wall can change the appearance of a house without turning the entire exterior into a building project. It can also be the most awkward face to reach. A rear elevation above a kitchen extension, a side wall beside a boundary or a gable with several roof junctions needs more thought than its square area suggests. This page looks at how to define individual-wall rendering in Alderley Edge so that the work has sensible edges and an achievable finish.

On this page
Decide what counts as the wall
Does the job include the narrow return around the corner, the inside of a window reveal and the area beneath a projecting sill? These pieces are easily missed when an enquiry describes only a front or rear elevation. Mark them on a photograph and show where the new work is intended to stop. A quotation should make clear whether adjoining faces are being touched or protected and left alone.
The final edge deserves particular attention. Stopping halfway across an uninterrupted plane can leave an obvious colour or texture difference. A corner, downpipe line or architectural break may provide a better position, but only if it produces a workable weathering detail. The best stopping point is not necessarily the point that gives the smallest measured area.
| Area | Decision |
|---|---|
| Corner return | Finish included or retained |
| Window reveal | Depth, frame junction and sill |
| Wall base | Termination beside ground or roof |
| Adjoining surface | Protection and agreed stopping line |
- Set the edges Decide where new render stops against brick, stone or an existing finish.
- Prepare the background Remove loose material, repair masonry and prepare suction and surface key. Existing paint needs a specified removal or alternative treatment.
- Base coat Built up to level the wall, with mesh where backgrounds change or crack.
- Finish Matched to the rest of the house or chosen as a deliberate contrast.
- Shed the water Copings, sills and the base bead keep rain off the top and away from the bottom edge.
The usual order of work. The survey and the chosen products decide the actual steps.
Find out why this face needs work
A wall selected for its appearance needs a different assessment from one selected because render keeps falling away. Describe the reason for the project and any previous attempts to put it right. Where there is local damage, the render repairs guide may help narrow the scope. If the background is sound and the issue is colour alone, a compatible coating may deserve consideration before wholesale removal.
Photographs can reveal the pattern of visible defects, but they cannot reliably establish the bond behind the surface. The survey should explain what can be retained and where an opening or closer inspection is required. If movement, bulging or a significant masonry defect is suspected, the cause needs appropriate assessment before a new finish is used to conceal it.
Follow the rainwater route
Look above the proposed work as well as at it. A leaking gutter, defective outlet or poor roof junction can keep marking a newly finished wall. The rendering brief should identify which rainwater items need attention and who will carry out that work. Replacement coatings are not a substitute for a functioning gutter or a suitable flashing.
At the bottom, check how the wall meets paving, soil or a roof below. These are different conditions and should not be dealt with by extending the finish indiscriminately into every gap. The termination must suit the construction and allow relevant drainage, ventilation and damp-proofing details to work. A sketch through the junction often explains more than an arrow on an elevation photograph.
Protect the materials beside the new finish
A side wall may meet a neighbour's brickwork, while a front return may end against painted timber. The adjoining surface can limit the tools and removal method that are appropriate. Record which materials must remain undamaged, including small items such as vents and cable clips. Include their temporary removal or protection in the work description rather than assuming they are incidental.
Where the new finish approaches a window or door, leave a defined detail for the frame junction and future maintenance. Filling every narrow gap with render can create a rigid bridge between materials that need a different connection. The reveal-depth article looks at coordinating those edges when several openings have to read as one elevation.
Match the finish honestly
Matching an old surface involves grain, colour, relief and weathering. A fresh sample can show the intended texture but cannot reproduce years of exposure on the untouched wall. Decide whether the aim is a local repair that remains readable or a renewed finish across a complete face. Both can be reasonable outcomes when agreed clearly; an unexplained promise of an invisible repair is less useful.
A silicone finish and a scraped monocouche finish are not equivalent ways to hide an uneven background. Their preparation and finished appearance differ. Choose the build-up for the wall first, then assess its colour beside the retained surface. A trial viewed from the usual approach to the property gives a more realistic impression than a tiny sample held directly in front of the eye.
Plan access around the actual route
Measure the route by which tools, materials and waste will move. A narrow gate, steps or a delicate paved area may change the practical arrangements. A tall wall cannot be priced responsibly from its height alone if the supporting access must pass over a conservatory or stand beside a boundary. Competent access planning should establish what can be reached safely and what protection is required.
If work needs access from neighbouring land, settle the arrangement before relying on it in the programme. A person living next door should not discover on the first morning that their path has become the proposed working area. Describe the occupied routes that need to remain available, where temporary barriers will go and how fittings will be reinstated when work is complete.
Separate the visible finish from the hidden allowance
Removal can reveal a background that differs from the original assumption. The quote should say how that finding is handled, including who approves any changed work and how the wall will be protected in the meantime. It is better to identify an uncertain area as an investigation item than to bury an unlimited repair allowance inside a single rendering price.
The cost guide explains the distinction between measured application, preparation, access and associated alterations. On a small wall, the edge work and access can be a substantial part of the operation. A per-square-metre figure without those items can therefore be a poor basis for comparing proposals, even where each contractor has measured the face accurately.
Check the completed face from more than one position
Inspect the finished wall from the normal garden, path or driveway viewing positions and check its junctions at close range. Allow for the system's drying and curing instructions before assessing the final colour. Review exposed brick and timber as well as the render itself: protection and careful reinstatement are part of the job where the scope says they are included.
If this is the first phase of a larger exterior refurbishment, retain the product and colour details for later work. Do not assume a second phase will match automatically after an interval. The house-rendering guide helps establish a wider elevation schedule so that today's single-wall decision does not create an awkward stopping point for the next phase.
Common questions
Can only the back of the house be rendered?
It can be considered as a separate project. The survey still needs to resolve corners, roof abutments, access and any change in wall construction. Check applicable permissions and ownership arrangements before treating the visible elevation as a self-contained scope.
See housing and planning information for Alderley Edge and nearby places, including the source and geography behind each figure.