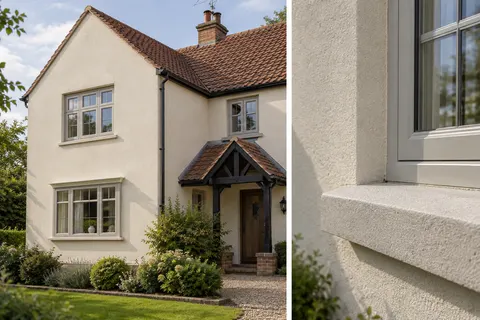
A thermal upgrade changes the wall geometry
External wall insulation in Alderley Edge | Wall details
External wall insulation places insulation outside the existing wall as part of a complete specified system, usually with a protective and decorative finish. It changes the position of the finished face, so the design extends beyond choosing an insulation board or render colour. For an Alderley Edge house or annexe, windows, roof edges, drains, services and boundaries all deserve attention. This guide explains the scope to establish before comparing proposals; it does not assume that every wall is suitable for the same upgrade.

On this page
Start with an assessment of the whole wall
Establish the construction, condition and existing coverings before selecting an insulation system. The assessment should consider moisture, existing defects and the relationship with the rest of the building. An external layer should not be used to conceal unresolved water entry or structural problems. Where specialist investigation is necessary, it belongs before the final specification rather than after the facade has been covered.
Different parts of a house may have different wall types. A later annexe or extension should not automatically receive the same detail as the original building. The whole-house rendering guide helps identify those changes in an elevation schedule. A thermal-upgrade proposal then needs to explain how the chosen system deals with each relevant construction and the transitions between them.
- Existing wall Prepared; fittings removed and the base track fixed above ground level.
- Insulation boards Bonded with adhesive and, in most systems, mechanically fixed to the wall.
- Basecoat with mesh Reinforcement mesh embedded across the board joints and around openings.
- Primer Where the system requires it.
- Finish render A thin-coat finish that weatherproofs the insulation.
Wall on the left, finish on the right. Not to scale: coats, thicknesses and primers follow the chosen manufacturer’s system and the condition of the wall.
Treat the components as one system
Insulation, fixings, reinforcement, base layers, trims and finishing materials work together. A quote listing a generic board and a decorative coat leaves too much unresolved. Ask for the complete named system, supporting design information and the basis for its use on the building. Product substitutions should be considered against that system, not treated as harmless changes because the final colour looks similar.
The final silicone finish is only the outer visible part of one possible build-up. Its appearance cannot establish the suitability of the insulation or fixings behind it. The design must also address relevant building-regulations requirements, including those applicable to the particular building type. Compliance should be resolved through the appropriate project process, rather than inferred from a material brochure.
Draw the openings at their new depth
Adding thickness outside the wall changes the reveal and the relationship with the window frame. Establish the proposed treatment around each opening, including the sill projection and the way water leaves the surface. Small openings can become awkward if the detail is left until installation. A section drawing makes these consequences easier to assess than an elevation image alone.
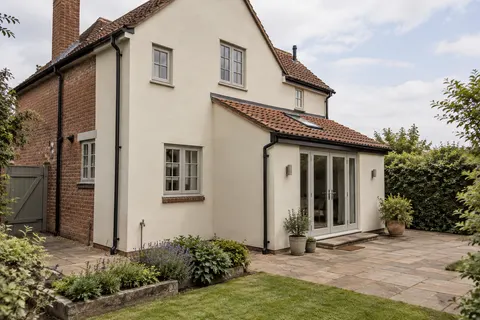
The article on insulating a detached annexe considers the smaller-scale version of this problem. Even a modest wall area can involve several complicated openings. Where windows are also being replaced, coordinate the frame position and installation sequence with the insulation design so that one trade does not undo the intended detail of another.
| Junction | Resolve in the design |
|---|---|
| Window | Reveal, sill and frame connection |
| Roof edge | Projection and weathering |
| Ground | Base termination and adjacent levels |
| Services | Extensions, relocation and responsible trade |
Resolve roof and ground junctions
At the top of the wall, check whether the eaves, verge or other weathering detail remains suitable after the finished face moves out. Alterations may be required, and their scope should be allocated before the insulation contractor starts. A narrow overhang should not become a permanent improvised junction because the roofline work was absent from the quotation.
At the base, the system needs a detail suited to the wall construction and surrounding ground. Paving levels, drainage and existing damp-proofing can all affect the arrangement. The insulation should not simply continue into every available gap. The relevant designer should establish the termination and how it connects with adjacent parts of the building without obstructing intended functions.
Plan services and attachments before covering the wall
External cables, pipes, outlets and vents may need relocation or extension. Identify who is authorised and competent to undertake each alteration, especially where a utility or specialist installation is involved. The rendering team should not be assumed to own every service attached to the wall. Those responsibilities affect both the programme and the completeness of the quoted package.
Future attachments also matter. A heavy awning, gate fitting or other load needs an appropriate fixing arrangement through or around the insulation. Record the locations of any planned mounting points. Keeping that information after completion helps avoid later installers damaging the system or choosing fixings based solely on the visible rendered surface.
Agree the change in appearance and the approval route
External insulation can alter proportions around openings and at corners, even when the final colour resembles the old wall. Review those changes in drawings and samples. Retained stone, brick or timber features may complicate the proposal and should not be concealed by default. An attractive illustration is not a substitute for showing how the actual facade details will be handled.
Check relevant planning, heritage and building-control requirements for the address and scope. Cheshire East's named conservation areas provide a reason to use the correct boundary information, not a basis for assuming that every Alderley Edge property is constrained. The area guide distinguishes those sources from the housing statistics, which do not establish an individual building's suitability for insulation.
Ask for a programme with inspection points
The condition of the background, installation of specified fixings and formation of critical junctions may need inspection before later layers conceal them. Identify those points in the work sequence and agree who records them. Photographs can be useful, but they should accompany the relevant checks rather than replace them with an unstructured collection of images.
Plan access, deliveries and weather protection for the whole operation. An occupied home still needs safe routes, and the works may require more space than a decorative recoating job. If other trades are altering roof edges or services, their completion should be coordinated with the insulation stages. The programme should make those dependencies clear.
Compare the complete scope
A responsible quotation separates the system from associated alterations and identifies what has been assessed. Published savings figures cannot establish what a particular house will save without the relevant assumptions and assessment. The cost guide instead explains the items that make proposals comparable.
At handover, retain the system details, product information, inspection records and maintenance guidance. Explain any restrictions or requirements for future attachments and repairs. The finished wall may look similar to a render-only project, but it contains a different build-up. That distinction needs to remain clear for anyone who later cleans, drills, alters or repairs the exterior.
Common questions
Can insulation be added only to an annexe?
A separate building or part of a building can be assessed as its own project. The proposal still needs a suitable complete system, junction details and the relevant compliance checks. A small area does not remove the need to consider moisture, openings and connections.
See housing and planning information for Alderley Edge and nearby places, including the source and geography behind each figure.