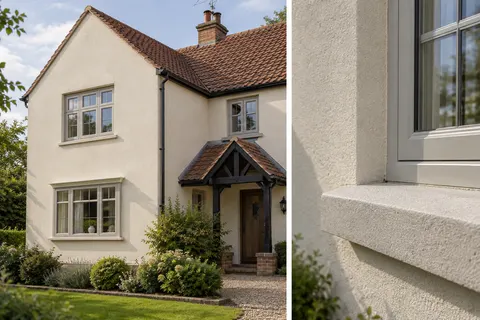
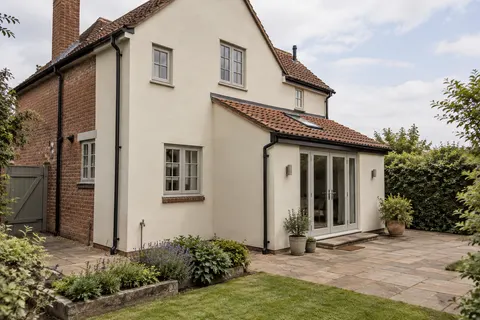
The opening is part of the elevation
Keeping window reveals consistent during refurbishment
Window reveals can make a refurbished facade look considered or piecemeal. The differences are not always obvious until the new finish draws attention to them: one sill projects less, another frame sits further back, and a narrow return has been left with an awkward edge. Consistency does not mean forcing every opening into identical dimensions. It means understanding the existing conditions and agreeing a coherent result that also works technically. This article sets out a way to make those decisions before rendering an Alderley Edge property.

On this page
Compare the openings before choosing a finish
Make a simple schedule of the windows on each affected elevation. Note the frame position, reveal depth, sill material and any visible alteration around the opening. Two windows that look alike from the road may have different construction or installation histories. The schedule should show those differences so that the rendering proposal does not assume every opening can receive one repeated detail.
Photograph the sides, head and sill as well as the face. A close view can reveal a shallow projection or a patch concealed by a pipe or shutter. These observations help identify what needs closer assessment; they do not establish the condition of concealed materials. Where the proposed work depends on an unknown detail, investigate it before finalising a standard junction for the whole elevation.
| Record | Why it helps |
|---|---|
| Frame position | Shows the existing and intended reveal depth |
| Sill and projection | Coordinates the water-shedding detail |
| Background condition | Defines preparation before finishing |
| Functional openings | Prevents accidental obstruction |
| Responsible trade | Allocates alterations and reinstatement |
Decide which dimensions are actually changing
Re-rendering can alter the finished plane of the wall, while external wall insulation usually introduces a more substantial change. The reveal then needs to relate to the new face rather than the old one. Show the proposed build-up in section and identify the consequences for the frame and sill. An elevation drawing alone may hide this change in depth.
If old render is being removed, the net change may be different from simply adding the new material thickness. Establish what is staying and what is coming off. Otherwise a drawing can overstate or understate the final projection. The detail should be based on the actual proposed layers, with allowance for the preparation needed to produce a suitable background.


Keep water shedding in the discussion
A sill is not just a visual band below the window. Its relationship with the finished wall affects how water is directed away. Check the proposed projection and relevant drip or weathering detail rather than assuming the existing sill remains suitable after the wall changes. The person designing the junction should explain the intended arrangement for the actual materials.
Where a sill needs alteration or replacement, allocate that work explicitly. It may require a different trade or a revised sequence. Avoid leaving the rendering team to create a permanent substitute during application because the issue was discovered late. A coordinated sill detail is easier to price and inspect when it appears in the brief from the start.
Coordinate replacement frames early
If windows are being replaced, the final frame position should be discussed with the exterior finish in mind. Identify who prepares the opening, who makes good the surrounding wall and who forms the final perimeter connection. The work should leave a suitable background for the render system rather than requiring it to conceal incomplete installation details.
The sequence needs to accommodate the relevant installation and curing requirements. A newly rendered reveal should not immediately be broken out for a planned frame change. Equally, recently installed glazing needs protection during wall preparation. The whole-house rendering guide helps place these dependencies within the wider elevation programme, especially where several trades are working around the same openings.
Define the frame-to-render connection
The finish should meet the frame through a detail suitable for the materials and system. That may involve specified trims or joint materials, but their role needs to be understood rather than treated as decoration. Do not assume that filling every visible gap with render creates a durable connection. The design should account for the actual frame, background and intended maintenance.
Keep functional openings clear. Frame drainage, wall vents and other necessary features must continue to work after finishing. A visually tidy reveal is not satisfactory if it obstructs something that was meant to remain open. Show those items in the detail or schedule so they are visible during preparation and checked before the final coat conceals the surrounding surface.
Agree the visual rules without chasing false uniformity
Existing openings may differ in width, alignment or depth. Decide which differences are part of the building and which are intended to be corrected. Forcing a perfectly uniform appearance can involve changes beyond the rendering scope and may be inappropriate where original details are important. A clear design can acknowledge variation while keeping colour, texture and junction treatment coherent.
A representative sample may help where the reveal finish is a prominent part of the facade. Include a corner or sill relationship if that is the unresolved issue. A flat colour patch on the middle of the wall cannot establish how a tight return will look. Review the detail from the usual approach and close to the opening before repeating it across the building.
Make preparation visible in the quotation
Repairs around openings can be more involved than the flat wall between them. Old fixings, damaged edges and different masonry may need attention before the finish is applied. Identify that preparation separately from the decorative coat. If the condition cannot be established until removal begins, agree the investigation and approval route for any changed work.
The quote should also identify protection, temporary removal of fittings and reinstatement. A small amount of visible render can involve considerable detail work around several windows. Comparing proposals solely by wall area can therefore obscure important differences. The useful comparison is whether each proposal produces the same prepared opening and agreed finished junction.
Inspect before the final texture hides the background
Relevant checks should take place while the supporting work remains visible. That can include the prepared reveal, specified reinforcement or trims and the sill arrangement. The exact inspection points follow the system and project design. Agree who will review them and retain photographs where they help explain what will subsequently be concealed.
If an opening differs from the assumed detail, resolve the change at that stage. Repeating an unsuitable arrangement because it has already been used elsewhere is not a good reason to continue. Update the schedule or drawing so that the later finish and inspection use the revised information. This is particularly useful where an older house contains several generations of windows.
Review the finished openings as a group
At completion, stand back and compare the openings across the elevation, then inspect the individual edges and reinstated fittings. Look for conformity with the agreed design, clear functional openings and the intended stopping points. Allow for the specified drying and curing stages when judging colour and surface appearance. Keep any outstanding items tied to a particular window reference.
The Alderley Edge overview links the relevant render, repair and insulation routes. Once the work is finished, keep the opening schedule with the system and window information. A future replacement or repair can then start from a known detail rather than undoing the connection without understanding why it was formed that way.
Common questions
Must all reveals end up exactly the same depth?
Not necessarily. Existing construction and retained details may justify differences. The important point is to decide the intended arrangement and form suitable junctions, rather than allowing inconsistent depths to arise from unplanned layers or missing coordination.
Can insulation be left out around a difficult opening?
That requires consideration within the complete insulation design. A local omission can affect the intended performance and junction behaviour. It should not be decided solely to make the visible render easier to finish.
See housing and planning information for Alderley Edge and nearby places, including the source and geography behind each figure.